Video recording and editing
Our video studios offer a range of services and capabilities to meet various video production needs, ideal for podcast creation, interview recordings, and the development of engaging promotional content.
Book studios and equipment
Our Library technology spaces, ThinkSpace and CreateSpace, are equipped with:
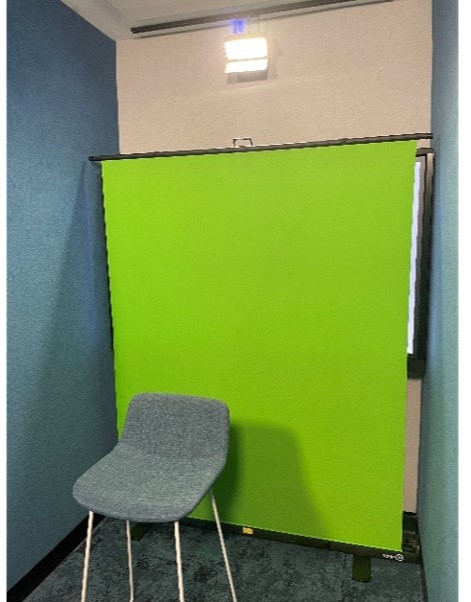
- Video recording studios that are soundproof and feature high quality cameras, lighting and audio recording equipment
- Design hubs with computers for editing.
All bookings are free for staff and students.
About video recording and editing
Video recording and editing enables creators to communicate ideas in an engaging and effective manner.
Using Library recording studios
1. Brainstorm an idea
Have an idea of what you are looking to create. Consider your target audience and what the content should cover.
2 Plan your video
Many creators use storyboards to create a plan for
3 Prepare for recording
A 3.0 USB with at least 4GB of space (formatted as exFAT or FAT32) to record the video as it will not record onto a computer. Your product can be loaded via USB or run from your laptop (HDMI connection supplied). Our friendly PLAs will also be able to assist on site.
4 Record
You can choose to use the green screen or the large digital screen behind you.
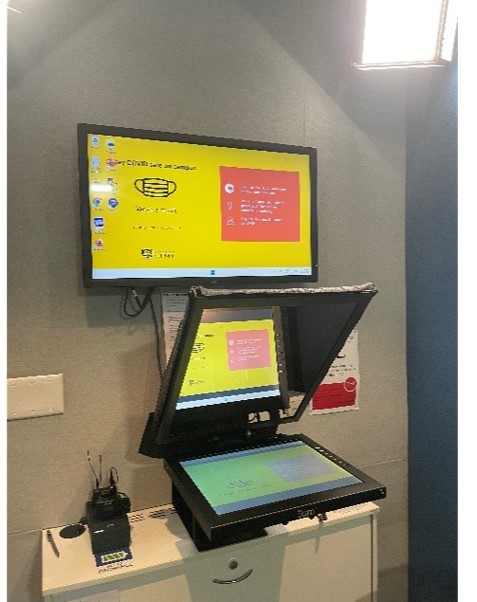
Your script can also be reflected on a clear screen directly in front of the camera (teleprompter), so that it appears as if you are looking into the camera while reading your lines.
1. Log into the screen using your university credentials (speak to a PLA if you do not have these).
2. Display your slides and script on the desired screens using the USB 1 input or HDMI input. Use the keyboard and touchpad to control the screens.
3. Place the USB 3.0 (which is supplied by Peer Learning Advisors) into the USB 2 output.
4. Turn on and attach the lapel microphones to yourself. These can be attached onto a collar or the cuff near the button of your shirt.
5. Use the labelled buttons on the wall to adjust the zoom, pan and screen height as desired. Ask a PLA to help set up the greenscreen if necessary.
6. Press “record” on the wall and wait for the button to stop flashing and glow red before starting.
7. When you are finished, press “record” again, and wait 30 seconds before removing the 3.0 USB from the output.
Once you have finished recording, you can begin editing your footage on a Design Hub computer or your own device.
How to edit your video
How to use Adobe Premiere Pro
1. Note: Adobe Premiere Pro can be accessed for free on Design hub PCs, or via a subscription to Adobe Creative Cloud on your own device.
2. Download Premiere Pro on a computer (Mac or Windows) or mobile device (iOS or Android).
3. Import your video from your device to Premiere Pro.
4. Edit your video in Timeline:
- add and refine audio
- change video colour
- create titles
- add transitions
- pan and zoom effects
- automatically reframe your clips.
5. Export and render the final product, saving it to your desired location.
How to use Shotcut
1. Note: Shotcut is a free semi-professional alternative to Adobe Premiere Pro. It has fewer cloud and AI functionalities, however is a robust video-editing platform.
2. Download Shotcut on your desktop or laptop.
3. Import your resources by either clicking “Open File” and selecting your file or importing a whole folder.
4. Use the Timeline basic menu to cut, copy, paste and trim the video. Add transitions and effects to make the final product look more professional.
5. Export and render the final product, saving it to your desired location.
Contact
Talk to a Peer Learning Advisor to learn more about 3D printing and modelling.